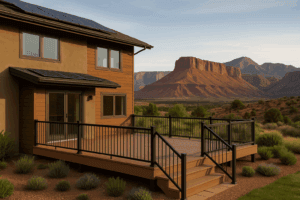
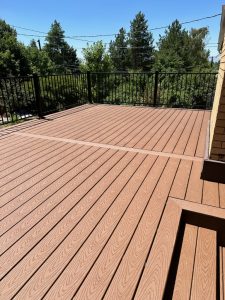
Are you looking to transform your backyard with beautiful Trex decking but don’t know where to start? At Utah Deck Company, we specialize in helping homeowners create stunning outdoor spaces. This step-by-step guide is designed just for you, taking the guesswork out of Trex decking Installation. Read on to learn how to build the deck of your dreams!
Contents
Planning Your Trex Deck
Before you dive into the installation process, proper planning is crucial. Start by measuring the space where you want to build your deck. Create a sketch of your desired layout, noting the placement of any stairs, railings, or built-in features.
Remember to check local building codes and HOA regulations. These guidelines will ensure your new deck meets safety standards and community requirements. Having a plan helps streamline your project, saving you time and effort later on.
Gathering Materials and Tools
To install a Trex deck, you will need specific materials and tools. Here’s a quick checklist to help you get started. Purchase enough Trex boards, joists, ledger boards, and fasteners to cover your design plan.
Basic tools you’ll need include a circular saw, drill, measuring tape, and level. Investing in quality materials and tools will make the installation process smoother and more enjoyable.
Preparing the Site
Preparation is key to a successful installation. Clear the area of any debris, rocks, or plants. Level the ground as much as possible to provide a stable foundation for your deck.
Mark your site using stakes and string to outline the deck’s perimeter. This step ensures that your project stays within the planned dimensions and layout.
Installing Ledger Board
The ledger board is crucial as it attaches the deck to your home. First, remove any siding or exterior coverings where the ledger board will be installed. Attach it securely using lag bolts, ensuring it is level and properly aligned.
Install flashing above the ledger board to prevent water from seeping behind it. Proper installation prevents structural damage and enhances the longevity of your deck.
Frame Construction
The frame serves as the skeleton of your deck. Start by installing the outer joists, making sure they are square and level. Reinforce the frame with additional joists placed at regular intervals, usually 16 inches apart.
Double-check all measurements and alignment. Any mistake at this stage can affect the entire structure, so take your time to get it right.
Bracing and Support
Proper bracing and support are essential for safety. Install post anchors at the corners and support points of your deck. Ensure they are plumb and secure the beams to the posts.
Adding cross-bracing between joists strengthens the frame and prevents swaying. This step ensures your deck will be sturdy and reliable for years to come.
Laying Trex Decking Boards
Now, it’s time to lay the Trex decking boards. Start at one end of the deck and work your way towards the other. Leave a small gap between each board to allow for expansion and drainage.
Use hidden fasteners for a clean look or screws color-matched to your decking. Secure each board to the joists, double-checking alignment as you go along.
Adding Stairs and Railings
If your deck includes stairs, now is the time to install them. Measure the rise and run of the steps, cutting the stringers to fit. Attach the treads securely, ensuring they are level.
Railings provide both safety and style. Install the posts first, then attach the railing sections. Verify that everything is level and secure to meet safety codes.
Finishing Touches
The final touches make your deck truly special. Consider adding skirting around the base to hide the frame and give your deck a polished look. Install caps on the railing posts for added aesthetic appeal.
Clean the decking to remove any sawdust or debris. A quick scrub makes your new deck look sharp and ready for use.
Maintaining Your Trex Deck
- Regular Cleaning: Sweep away leaves and debris, and use a mild soap solution to wash the surface.
- Inspect Joists: Periodically check the joists for any signs of wear or damage.
- Protect from Furniture: Use protective pads under furniture legs to prevent scratches.
- Avoid Harsh Chemicals: Stay away from bleach or strong acids as they can damage the decking.
- Stain Removal: Immediately clean any spills to avoid stains setting in.
Conclusion
Building your own Trex deck can be a rewarding experience, and we hope this guide makes the process easier for you. Remember, you’re not alone; Utah Deck Company is here to assist every step of the way.
Ready to take the plunge? Contact Us by phone at 801-921-6826 or Request a Free Quote today!


