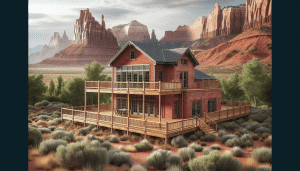
Looking to add value and beauty to your home with a top-notch deck? At Utah Deck Company, we specialize in Trex decking Installation, and we’re here to guide you through the entire process. Many homeowners feel overwhelmed by the idea of installing their own decking, but with this comprehensive guide, we aim to make it simple and enjoyable. Follow our step-by-step instructions, and you’ll be relaxing on your new deck in no time!
Contents
- 1 Planning Your Deck
- 2 Preparing the Site
- 3 Building the Frame
- 4 Installing the Deck Boards
- 5 Finishing Touches and Railing Installation
- 6 5 Important Tips for a Lasting Trex Deck
- 7 Enjoying Your New Trex Deck
- 8 Troubleshooting Common Issues
- 9 Why Choose Trex Decking?
- 10 Common Mistakes to Avoid
- 11 Final Thoughts
Planning Your Deck
Before diving into the actual installation, proper planning is essential for a successful Trex decking project. Start by deciding the size and layout of your deck. Consider any existing structures and landscape elements that might influence your design. Make sure to gain any necessary permits and check local building codes. Having a detailed blueprint ensures that you don’t encounter unexpected obstacles during installation.
Next, calculate the Materials you will need. Trex decking comes in various styles and Colors, so choose the one that best complements your home. Keep in mind that you will need not only the decking boards but also fasteners, joists, beams, and tools. Accurate calculations prevent material shortages, which can disrupt your work flow.
Preparing the Site
Once your plan is in place, it’s time to prepare the site. Clear all vegetation, debris, and obstacles from the area where your deck will be installed. Level the ground as much as possible to ensure a stable foundation. This step may involve digging and grading to create a flat surface. Taking the time to properly prepare the site will make the installation process smoother and safer.
After the ground is level, install the ledger board against your house, if your deck will be attached. The ledger board provides a sturdy anchoring point for your deck. Ensure the ledger is level and securely fastened to the house framing. Use a water-resistant membrane behind the ledger to prevent moisture damage to your home.
Building the Frame
The next step involves constructing the frame that will support your Trex decking. Set and secure your posts using concrete footings to ensure a sturdy and durable foundation. Space the posts evenly, following your deck plan’s specifications.
Once the posts are in place, it’s time to install the beams and joists. Beams run parallel to the ledger board, while joists run perpendicular to it. Ensure all components are level and securely fastened. The frame is essentially the skeleton of your deck, so precise and stable construction is crucial for a high-quality finish.
Installing the Deck Boards
With the frame complete, you’re ready to install the Trex decking boards. Start along the outer edge of the deck, laying each board perpendicular to the joists. Use hidden fasteners or screws to secure the boards, maintaining a uniform gap between them. This spacing allows for expansion and contraction due to weather changes.
As you work your way inward, make sure each board is properly aligned and secure. Cutting the boards to fit around obstructions, such as posts or railings, might be necessary. These cuts should be precise to maintain a professional appearance.
Finishing Touches and Railing Installation
After all the deck boards are in place, it’s time for the finishing touches. Trim the deck edges to create a clean, polished look. Sand any rough spots or edges to ensure safety and comfort. Once satisfied with the decking surface, it’s time to install the railing.
Cut your railing posts to the desired height and attach them securely to the frame. Install the top and bottom rails, followed by the balusters. Ensure all components are securely fastened and level. Railings provide safety and add aesthetics to your deck, so take your time with this step.
5 Important Tips for a Lasting Trex Deck
- Proper Ventilation: Ensure there is sufficient space between the decking boards and the ground for airflow. This prevents moisture buildup and prolongs the deck’s lifespan.
- Regular Cleaning: Keep your deck clean by sweeping away debris and washing it with a gentle cleaner. Regular maintenance helps prevent mold and mildew growth.
- UV Protection: Consider applying a UV-resistant finish to protect your deck from sun damage. This maintains its color and appearance over time.
- Inspect Fasteners: Periodically check all fasteners and screws to ensure they remain secure. Tighten any loose fasteners to prevent structural issues.
- Seasonal Preparation: Prepare your deck for seasonal changes, such as winterization, to protect it from harsh weather conditions. Cover or store outdoor furniture to reduce stress on the deck.
Enjoying Your New Trex Deck
With the installation complete, it’s time to enjoy your new Trex deck! Arrange your favorite outdoor furniture, add some decorative elements, and invite friends over for a BBQ or relaxing evening. A well-installed deck can transform your outdoor space and create countless memories.
Don’t forget to regularly inspect and maintain your deck to keep it looking and functioning at its best. Regular care ensures your investment lasts for years to come.
Troubleshooting Common Issues
Even with careful planning and execution, you might encounter some issues during or after the installation process. Common problems include uneven boards, loose fasteners, or gaps in the decking. If you notice any irregularities, address them promptly to prevent further complications.
Review your installation steps and make necessary adjustments. Sometimes, small tweaks can resolve issues without significant rework. If problems persist, consulting with a professional may be beneficial to ensure your deck remains safe and beautiful.
Why Choose Trex Decking?
Trex decking is a popular choice due to its durability, low maintenance, and eco-friendly features. Unlike traditional Wood, Trex resists fading, staining, and scratching. Its Composite material combines recycled wood and plastic, offering the look of wood without the associated upkeep.
Choosing Trex also means you’ll spend more time enjoying your deck and less time maintaining it. Trex stands up to the elements better than wood, making it ideal for the variable weather conditions we often experience. Its longevity and aesthetic appeal make it a worthwhile investment for any homeowner.
Common Mistakes to Avoid
To ensure a smooth installation, avoid these common pitfalls. First, improper spacing between deck boards can lead to water accumulation and damage. Always maintain the recommended gap to allow for adequate drainage and ventilation.
Second, failing to secure the ledger board correctly can compromise the stability of your deck. Follow manufacturer guidelines and local codes to ensure a safe, level attachment. Lastly, using incompatible fasteners or tools can damage your Trex decking. Use only recommended products for the best results.
Final Thoughts
Installing Trex decking might seem daunting, but with the right guidance and preparation, it can be a rewarding DIY project. Following our comprehensive guide ensures a successful installation and a deck that will be the envy of your neighborhood.
If you ever need professional assistance or have questions along the way, we’re here to help! Contact Utah Deck Company by phone # 801-921-6826 or Request a Free Quote.


